➕ Add
To access this page, click the Add Rendered Service button in the top right corner of the Rendered Services page.

On this page, you'll find all the necessary fields required to add a new rendered service.
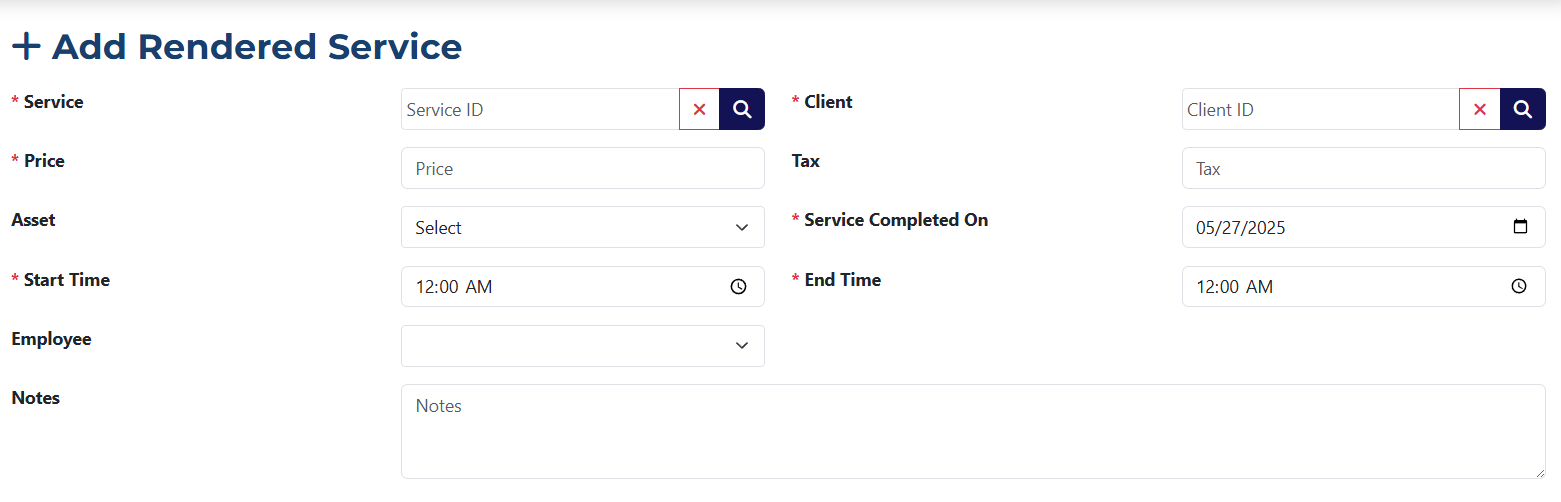
Fields marked with an asterisk * are required.
In the Service field, you can click on the icon 🔍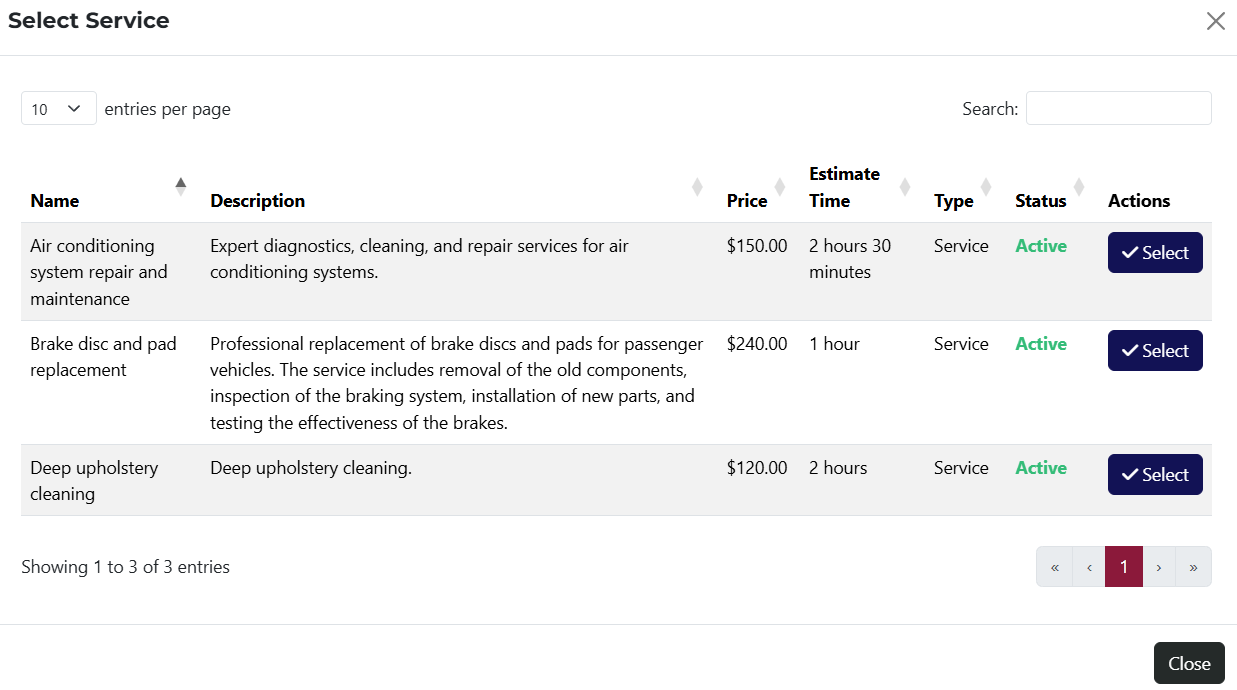 to open a popup listing all services added to the system.
Once you click the ✔️ Select button, the Price and Tax fields will be filled in automatically.
To select the client who received the service, click 🔍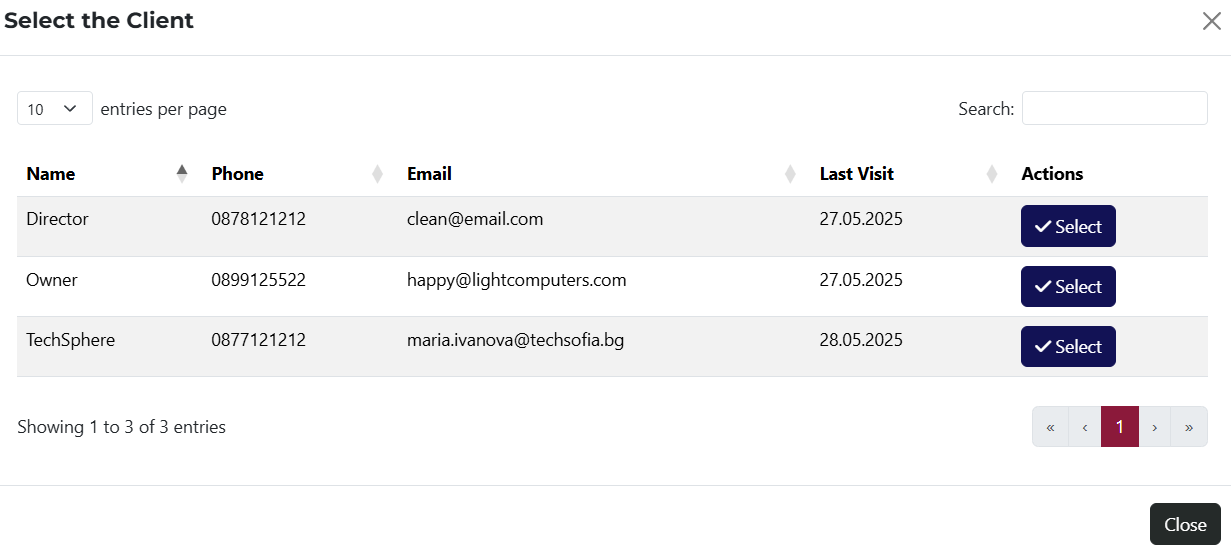 in the Client field. A popup window will appear with all the clients in the system. After selecting a client, the system will automatically fill in the Assets field with the client's available assets.
You can use keyword search in both the Service and Client fields.
- Asset – in this field, select from the client's assets. For example, if the client has several car brands, you can specify which one the service was provided for. Once an asset is selected, the system will automatically fill in the related custom fields in the rendered service, if any exist.
- Service Completed On* – select the date when the service was provided. This field defaults to today’s date but can be changed.
- Start Time* – select the start time of the service.
- End Time* – set the end time of the service.
- Employee – choose from a dropdown of employees who performed the service. The list includes all staff members added to the system.
- Notes – optional field where you can add comments related to the rendered service.

These are custom fields that can be added or modified from the system settings.

- Create – this is a radio button that allows you to add either an Invoice or a Purchase. Once selected, the following fields will be available:

- Date Issued – select the date the invoice was issued. Defaults to the current date but can be changed.
- Due Date – choose the due date for the invoice. This field is visible only if the Invoice option is selected.
- Subtotal – this is a read-only field that shows the net amount.
- Tax – this is also a read-only field showing the VAT value.
- Amount Received – enter the amount received for the invoice.
- Grand Total – this field shows the total amount of the invoice.
This feature makes invoice creation more efficient. There's no need to enter invoice data manually or open other pages.