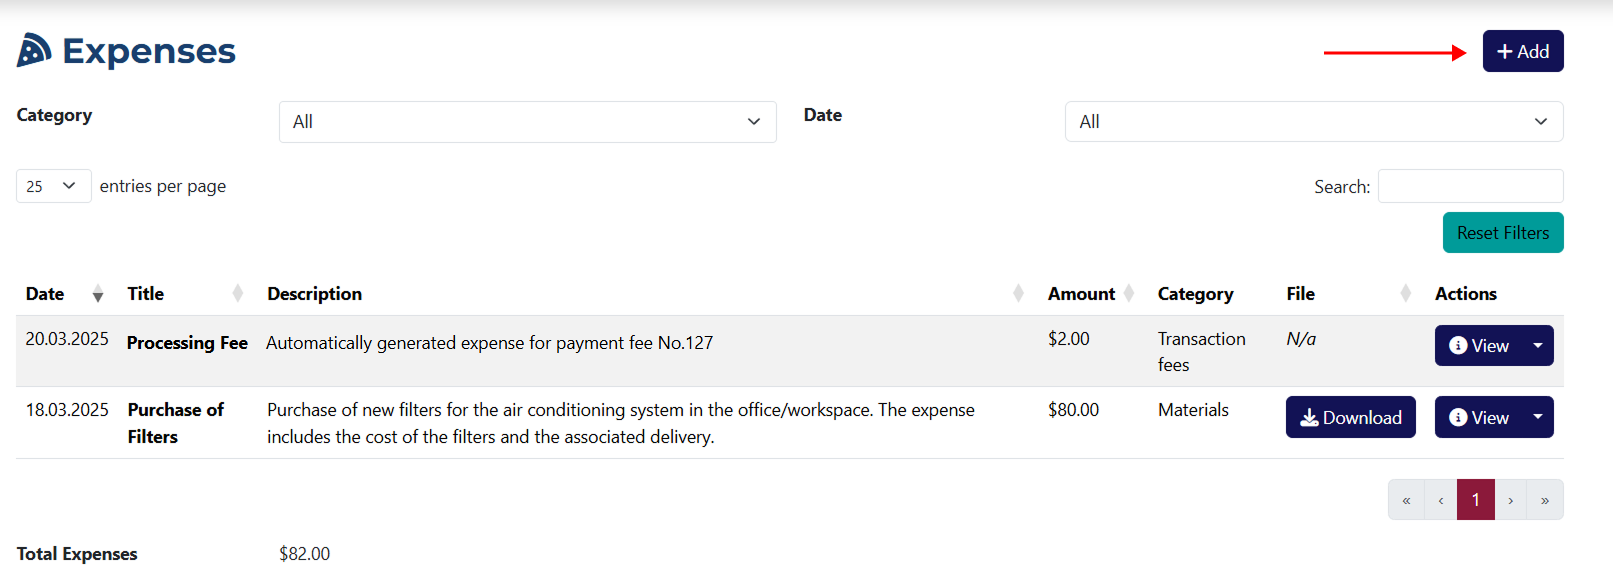
➕ Add
This is the page where you can add a new expense. You can link expenses to a client, part, or service. To access this page, click the Add Expense button in the top-right corner of the expenses page.
Adding an Expense
The Add Expense page allows you to enter all the necessary details for the expense you're recording.
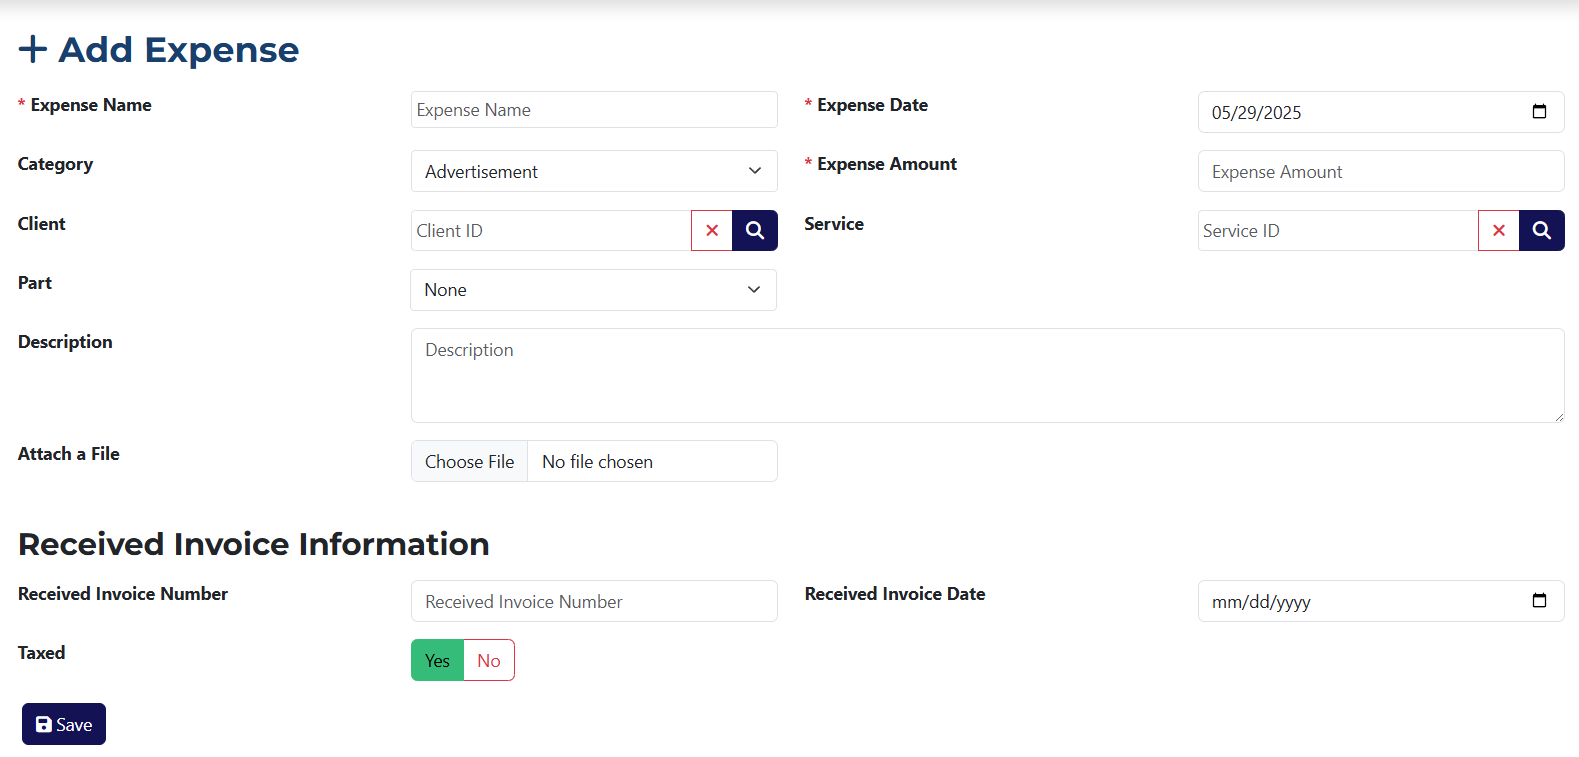
This form includes the following fields:
info
All fields marked with an asterisk * are required.
- Expense Name* – required field where you must enter a name for the expense.
- Category – a dropdown menu to select the category for the expense.
- Client – select a client to associate with the expense. Clicking 🔍A popup showing all available clients
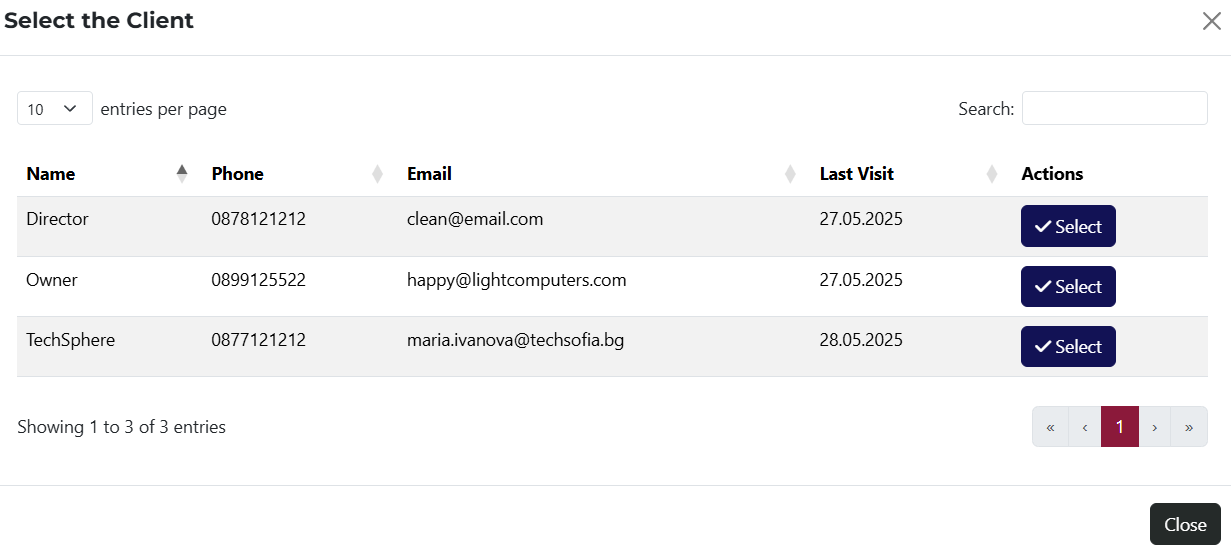 will open a list of all clients added to the system.
 - Part – a dropdown list containing all parts added to the system. You can select one to link it to the expense.
- Description – optional field for entering a description of the expense.
- Attach a File – allows you to attach a file to the expense. Clicking the button opens a file selection dialog.
- Expense Date* – required field for selecting the date of the expense. By default, it is set to the current date but can be changed.
- Expense Amount* – required field for specifying the amount of the expense.
- Service – dropdown menu to link a service to the expense. Clicking 🔍A popup showing all available services
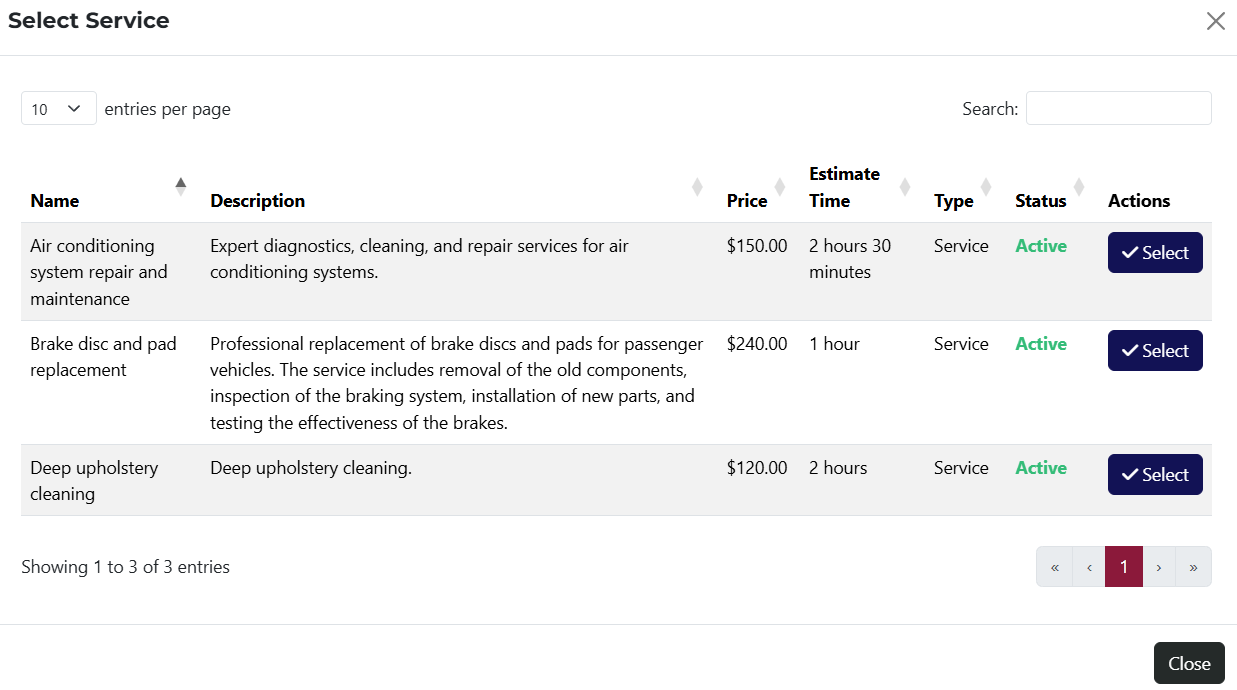 opens a list of all services in the system.
 - Received Invoice Number – optional field where you can enter an invoice number related to the expense.
- Invoice Receipt Date – optional field to specify the date the invoice was received.
- Taxed – radio button allowing you to indicate whether the expense is subject to VAT. By default, this is set to Yes.
tip
You can add or edit the available options in the Category dropdown from the system settings page.