➕ Add
To access this page, click the Add button in the top right corner of the Payments page.
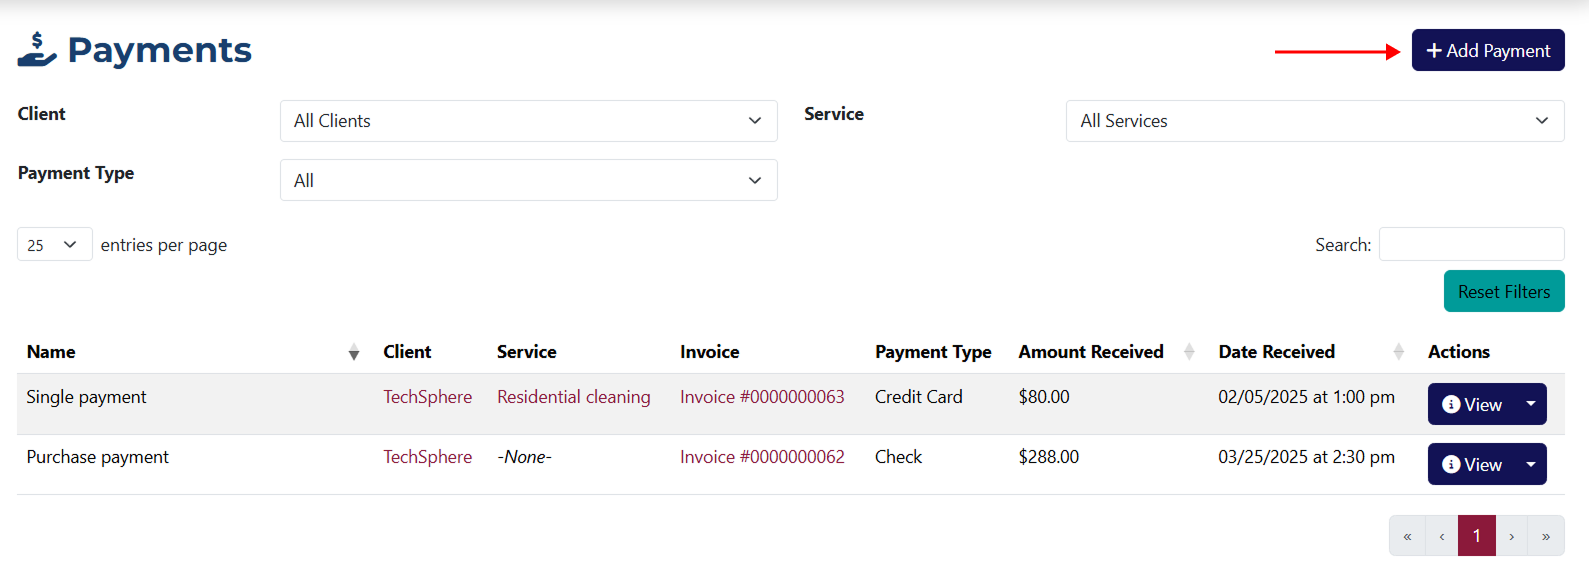
Adding a Payment
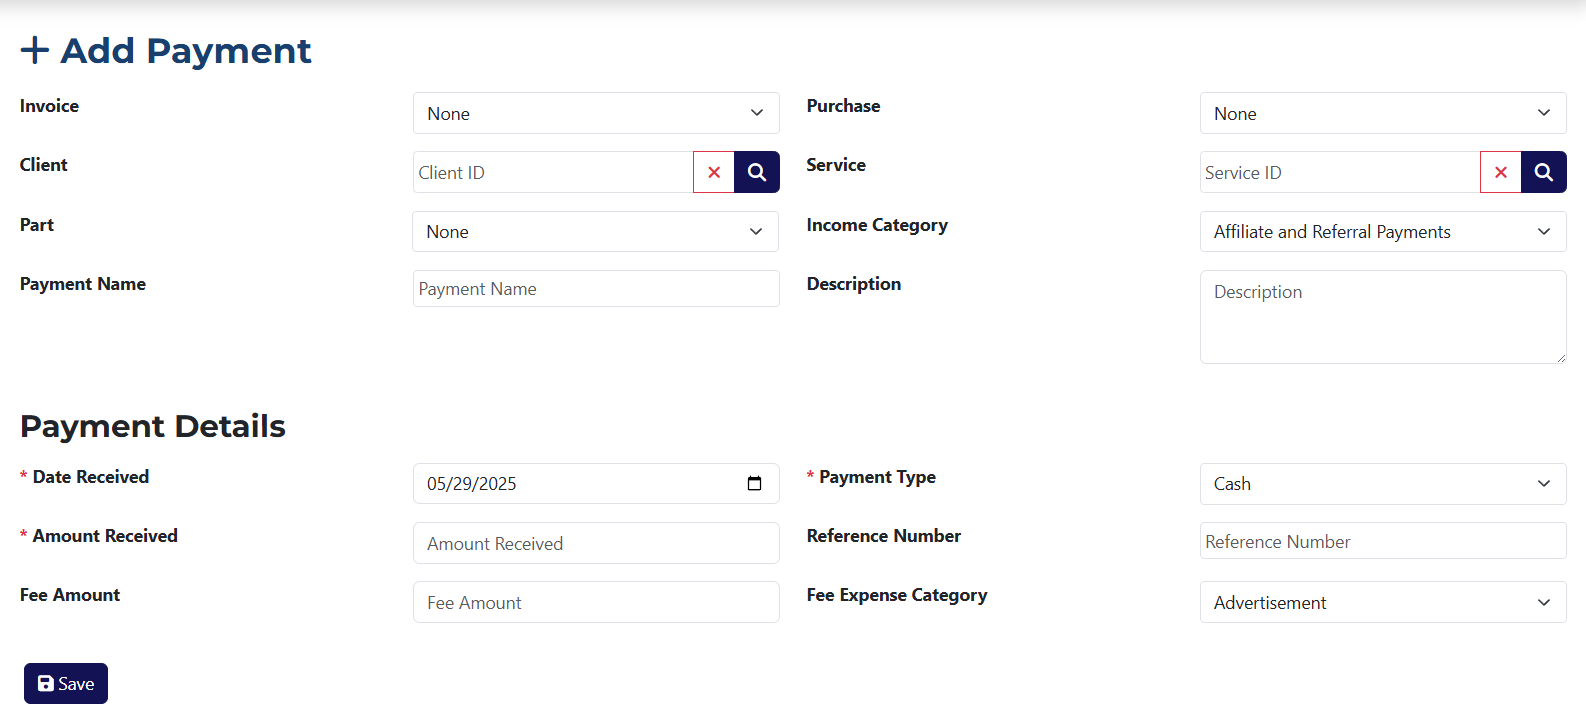
On this page, you can create a new payment linked to an existing invoice, purchase, or part.
info
Fields marked with an asterisk * are required.
The form includes the following elements:
- Invoice – here you can select the invoice you want to associate the payment with. If no invoice is selected, the payment will be created without one.
- Client – here you can select the client to whom the payment is issued. Clicking on 🔍Popup showing all clients
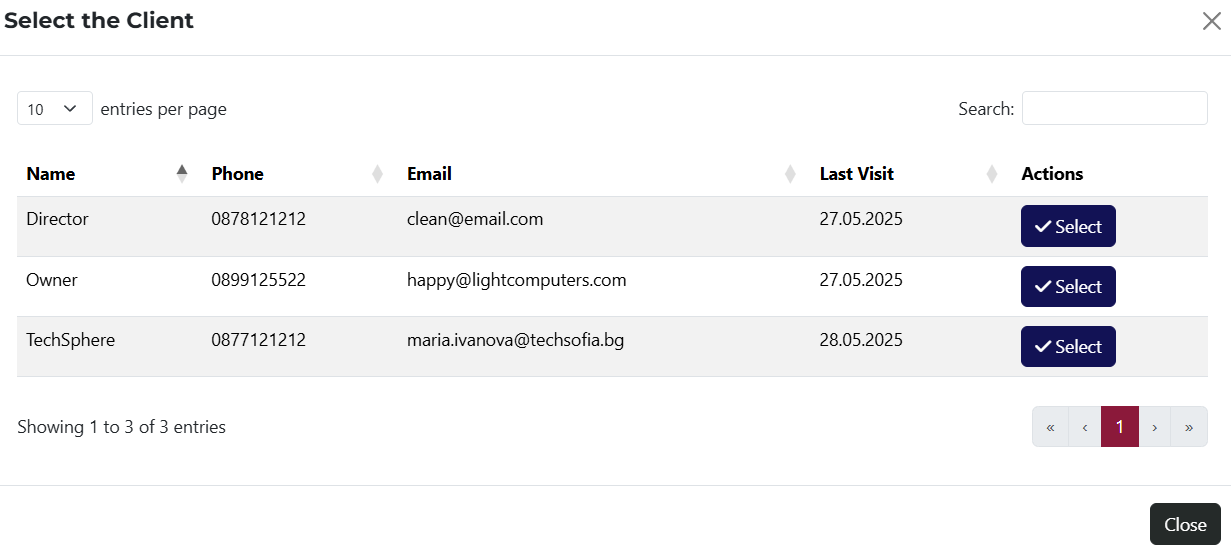 will show all the clients added to the system.
 - Part – a dropdown menu listing all added parts in the system. You can select a part to include in the payment.
- Payment Name – in this field, you can enter a name for the payment that will appear in the payments list.
- Purchase – a dropdown menu from which you can choose a purchase to add to the payment. It contains all the added purchases in the system.
- Service – select a service to include in the payment. Clicking on 🔍Popup showing all services
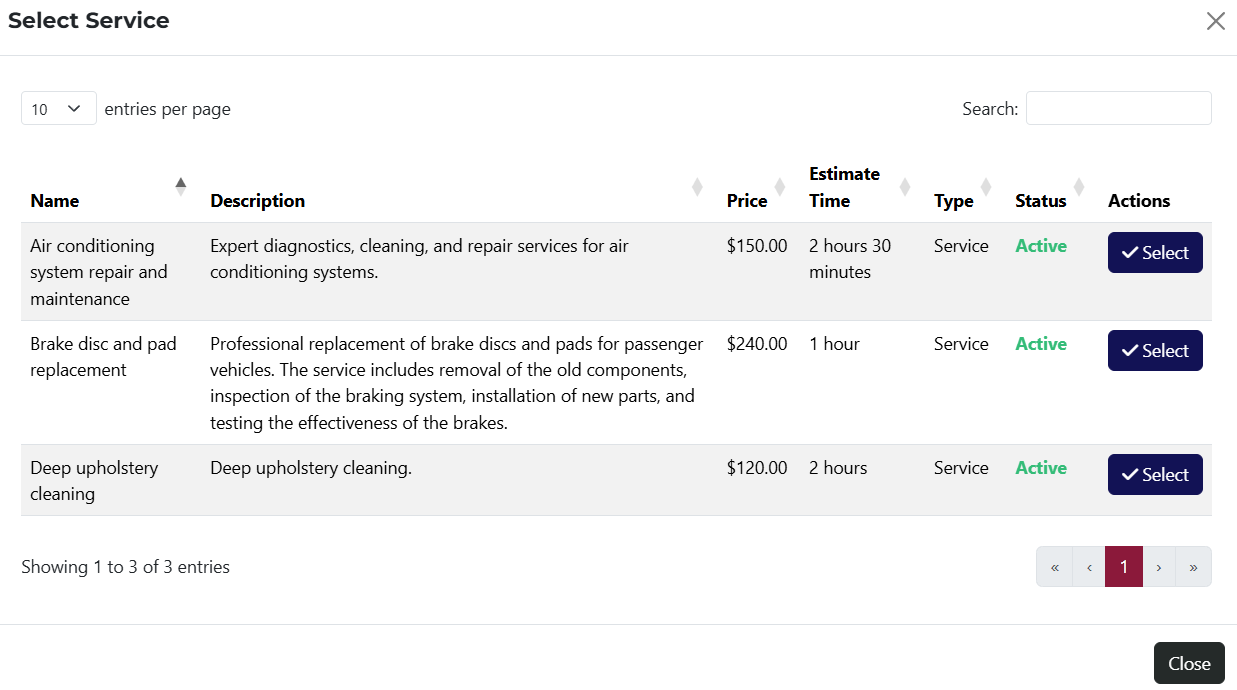 will show all added services in the system.
 - Income Category – a dropdown menu where you can select the source of the payment.
- Description – in this field, you can add a description for the payment.
- Date Received – you must select the payment date here. By default, it is set to the current date, but you can change it.
- Amount Received – you must enter the amount received for the payment here.
- Fee Amount – a field to enter a fee that will be included in the payment.
- Payment Type – a dropdown menu from which you can choose the method of payment.
- Reference Number – here you can enter a reference number for the payment.
- Expense Fee Category – a dropdown menu where you can select the category to which the fee belongs.
info
The options shown in the dropdown menus for Payment Type and Income Category can be added and modified from the system settings.